This Guide Will Help You Install OpenStack on CentOS 7.
How to Solve All Error's During Installation of Single & Multiple Node OpenStack in CentOS 7 with Images
https://itcloudnet.blogspot.in/2017/05/how-to-solve-all-errors-during.html
How to Install of OpenStack in CentOS 7 Step by Step Procedure
https://itcloudnet.blogspot.in/2017/05/how-to-install-of-openstack-in-centos-7.html
Interview Questions and Answers on OpenStack for Fresher and Experience
https://itcloudnet.blogspot.in/2017/05/interview-questions-and-answers-on.html
DevStack is a series of extensible scripts used to quickly bring up a complete OpenStack environment suitable for non-production use. It is used interactively as a development environment. Since DevStack installs all-in-one OpenStack environment, it can be used to deploy OpenStack on a single VM, a physical server or a single LXC container. Each option is suitable depending on the hardware capacity available and the degree of isolation required. A multi-node OpenStack environment can also be deployed using DevStack, but that’s not a thoroughly tested use-case.
For either kind of setup, the steps would involve installing a minimal version of one of the supported Linux distributions and downloading the DevStack git repository. The repo contains a script stack.sh that must be run as a non-root user and will perform the complete install based on configuration settings.
The official approved and tested Linux distributions are Fedora(latest and previous release) and CentOS/RHEL 7(latest major release). The supported databases are MySQL and PostgreSQL. RabbitMQ and Qpid are the recommended messaging service along with Apache as the webserver. The setup defaults to a Flat DHCP network using Nova Network or a similar configuration in Neutron.
The default services configured by DevStack are Keystone, Swift, Glance, Cinder, Nova, Nova Networking, Horizon and Heat. DevStack has a plugin architecture to include additional services that are not included directly in the install.
The process to get DevStack up and running goes like this:
Download CentOS 7 :- https://www.centos.org/download
Download Virtual Box :- https://www.virtualbox.org/wiki/Downloads
Download Script of Devstack :- https://github.com/openstack-dev/devstack
Website of OpenStack :- https://www.openstack.org
Step1 :- How to Install a Minimal CentOS 7 in Virtual Box
Step2 :- Now Update and Install Dependencies by Typing Below Commands
sudo yum update
sudo yum install -y git yum-utils
MySQL Database,
RabbitMQ,
Service Admin,
Service Authentication,
Horizon and
Keystone Services.
Expect the Remaining Installation Steps to Take a Long Time at Least 10-30 Minutes (Depending on Your Internet Connection). See Below Screen Shot
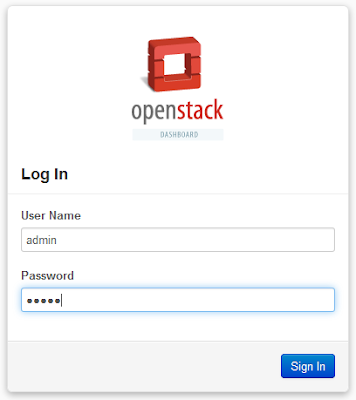
You can login with the username admin, and the password you selected in the configuration file (also shown at the end of DevStack installation).
Thats it! Next I’ll be adding images to OpenStack and creating instances. Stay tuned for more on that. Thanks!
How to Solve All Error's During Installation of Single & Multiple Node OpenStack in CentOS 7 with Images
https://itcloudnet.blogspot.in/2017/05/how-to-solve-all-errors-during.html
How to Install of OpenStack in CentOS 7 Step by Step Procedure
https://itcloudnet.blogspot.in/2017/05/how-to-install-of-openstack-in-centos-7.html
Interview Questions and Answers on OpenStack for Fresher and Experience
https://itcloudnet.blogspot.in/2017/05/interview-questions-and-answers-on.html
DevStack is a series of extensible scripts used to quickly bring up a complete OpenStack environment suitable for non-production use. It is used interactively as a development environment. Since DevStack installs all-in-one OpenStack environment, it can be used to deploy OpenStack on a single VM, a physical server or a single LXC container. Each option is suitable depending on the hardware capacity available and the degree of isolation required. A multi-node OpenStack environment can also be deployed using DevStack, but that’s not a thoroughly tested use-case.
For either kind of setup, the steps would involve installing a minimal version of one of the supported Linux distributions and downloading the DevStack git repository. The repo contains a script stack.sh that must be run as a non-root user and will perform the complete install based on configuration settings.
The official approved and tested Linux distributions are Fedora(latest and previous release) and CentOS/RHEL 7(latest major release). The supported databases are MySQL and PostgreSQL. RabbitMQ and Qpid are the recommended messaging service along with Apache as the webserver. The setup defaults to a Flat DHCP network using Nova Network or a similar configuration in Neutron.
The default services configured by DevStack are Keystone, Swift, Glance, Cinder, Nova, Nova Networking, Horizon and Heat. DevStack has a plugin architecture to include additional services that are not included directly in the install.
The process to get DevStack up and running goes like this:
- Pick a Linux distribution and install it. I’m using CentOS7.
- Download DevStack and do a basic configuration.
- Kick of the install and grab a cup of coffee.
Download CentOS 7 :- https://www.centos.org/download
Download Virtual Box :- https://www.virtualbox.org/wiki/Downloads
Download Script of Devstack :- https://github.com/openstack-dev/devstack
Website of OpenStack :- https://www.openstack.org
Step1 :- How to Install a Minimal CentOS 7 in Virtual Box
Step2 :- Now Update and Install Dependencies by Typing Below Commands
sudo yum update
sudo yum install -y git yum-utils
Step3 :- Add an Openstack User
Step4 :- Now First Login into Root by 'su' then Create a New User and Clone Devstack
Step5 :- Now Installation of Devstack by Running Script
Now You Need to Wait for 2 to 3 minutes and You'll Need to Set a New Password for theMySQL Database,
RabbitMQ,
Service Admin,
Service Authentication,
Horizon and
Keystone Services.
Expect the Remaining Installation Steps to Take a Long Time at Least 10-30 Minutes (Depending on Your Internet Connection). See Below Screen Shot
Step6 :- Final Step Open Your Browser Visit New Devstack Installation URL
Ex :- http://192.168.0.110
Thats it! Next I’ll be adding images to OpenStack and creating instances. Stay tuned for more on that. Thanks!


